
October 2009
"Its a car again!
26/10/09 08:31 Filed in: Duetto | Restoration
The rebuilt 1600cc engine is running in the Duetto! Kathy watched as I started it up and declared "Its a car again!" Well, the paint needs to go on, along with all the trim, but one could certainly drive it down to the grocery store in a pinch 
Here is the final product - red powder coated valve cover and black powder coated carb pennum.
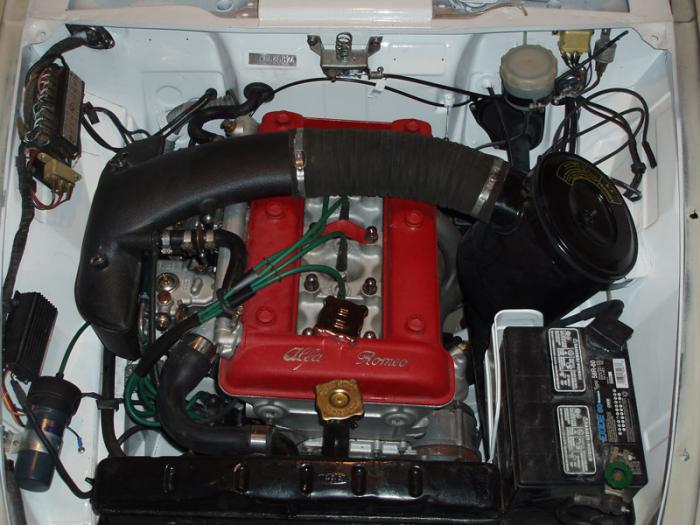
Assembling the Duetto, I am continullay amazed that these were built in mass production. So many items are rather tedious to install and align. The secret might be in the sequencing and sub-assembly steps, none of which I am following!
Ocham's Razor suggests that the simplest solution to a problem is probably the correct one. I was muttering that over and over while attempting to start the new engine. It would flutter but not catch. Should not be the carbs! Should not be the ignition, should not be the crank/piston head assembly, etc, etc - all to complicated, must be something simple.... What would be a simple explanation - nope, plenty of gas in the tank - battery secure with good ground and +12v power delivery.
When I took a peak at the rear exhaust pipe to see if there was any clue in the deposits, it jumped out at me: Duh!!!! The end of the pipe was still swaddled in a plastic bag and a layer of duct tape - put there by the media blaster last May!!! Pulled that off and the sweet thing fired up immediatly.
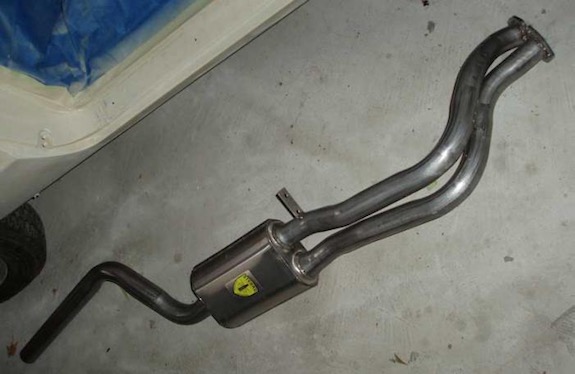
Here is the last major item I had to buy - the forward exhaust section. The exhaust sounds awesome - better than I remember the 1750 sounding. The pipes are all the same save this front section, which needed to be proper for the shorter 1600 head hight. I stayed with the stainless Stebro product to keep it the same, against my displeasure of the $$$. A bit more than two years ago. I must say they do a good job jigging these up, although even those 1 or 2 degrees of error lead to a lot of %$$###!!!! Stainless of those gauges does NOT bend.
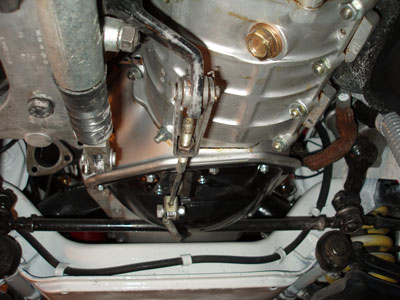
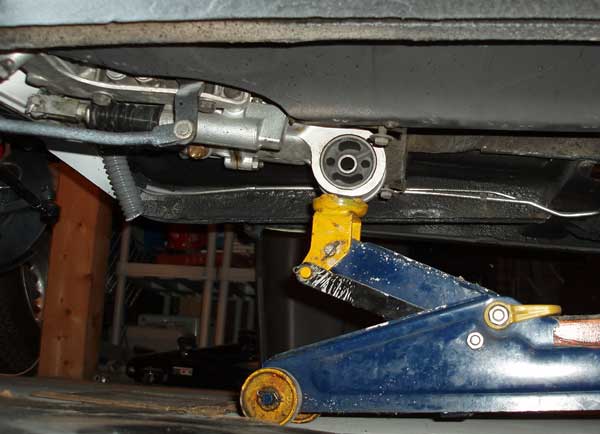
Here is a view of the clutch and master brake linkages under the car. I just love the way the mechanicals stand out against the white paint. Now if only it would stay so clean and bright.
Here is a view down into the transmission shift tower. The shift lever mounts on the rod extending upward. The center "button" is pushed down by the linkage in the shift lever to allow reverse to be selected. The short rod and nut at 4 o'clock keep the arm from comming back (into reverse) unless the button (connected to the little rod protruding out at 3 o-clock) is depressed so as to clear the lock.
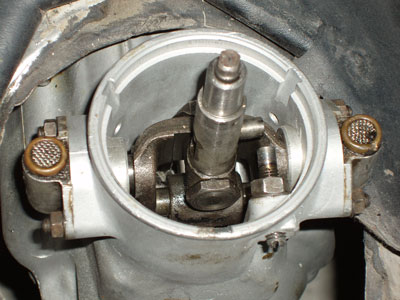
One thing I tried this installation is to leave this shift gimbal mechanism out of the tower, and install it after the tranny is in the car. Made getting the engine/tranny a bit easier when dropping it in. That rod sticking up would otherwise drag in the bodywork.
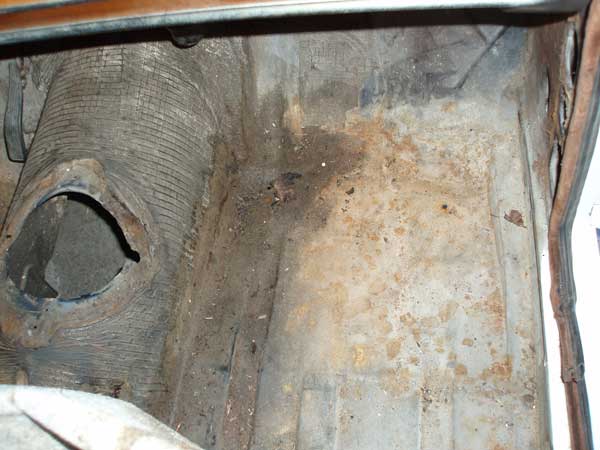
The last major chassis work was to replace the battery tray. The bottom of the tray was heavily corroded. Probably a combination of rust and battery acid. It was spot-weleded into place, so the wleds were removed with a cutter. That was done last spring when the engine bay was prepped for media blasting.
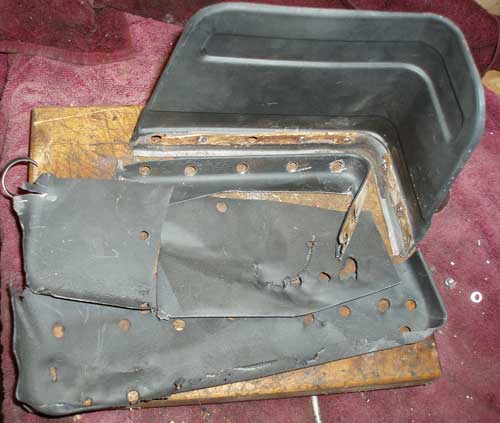
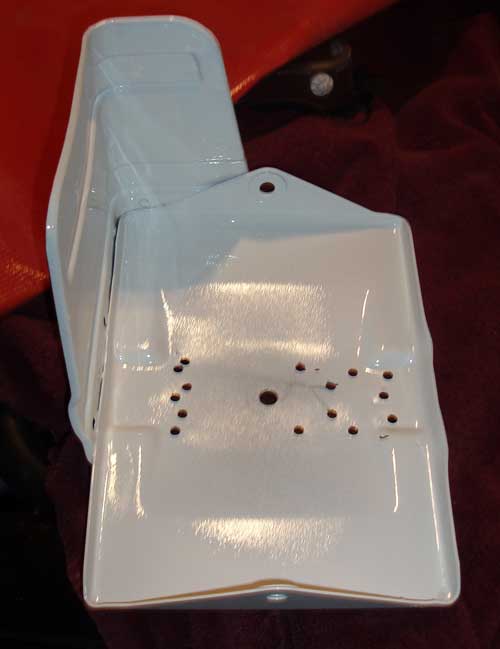
The side shield was still in fine condition, so I thought I would just procure a bottom tray and re-assemble. Finding a tray proved difficult. (geeze, I had 6 months!) I bought one that was perfect - for my 72 GTV... Those folks in Texas had a nice stainless one - but at a staggery price. For the same numbers in euros, I found a complete unit at a German supplier - even had the support brace. In the end, i bought a generic stainless tray for relative peanuts and went about making it fit.

The bottom of the new pan had to be flattened out a bit. The side shield was mig welded on - couldn't get my wimpy spot welder to bite into the stainless. Holes were marked and drilled to attach to fender and support, to allow it to be plug-welded into place.
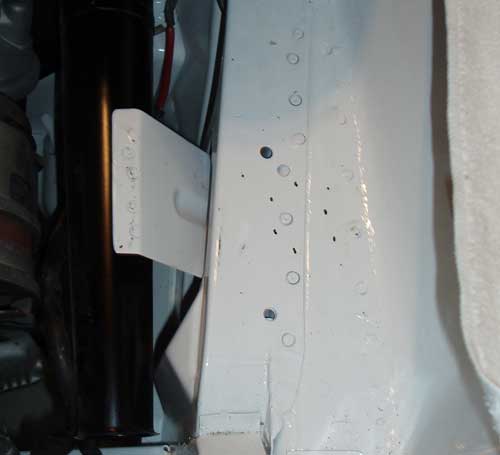
The mounting area was marked for the weld points, then the paint was ground off and replaced with weld-through primer. Owing to the deep dish of the new tray, the mounting area on the fender will be about 1/3 the number of the original welds, but the result feels really solid. As an upside, there will be less snug-fitting area underneath to collect water and pose a rust issue in the future.
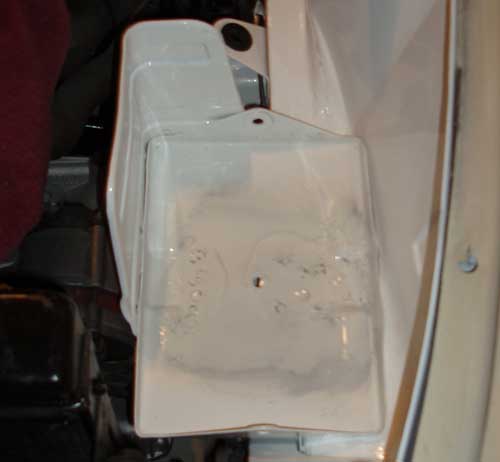
I painted the assembly to match the engine bay. The matching upper battery hold down frame was bought also, and it will be secured with two standard threaded rods. The tray holds the original battery rubber tray perfectly! I am planning on using an Odyssey Drycell Battery (it has a red top...)

Here is the final product - red powder coated valve cover and black powder coated carb pennum.
Assembling the Duetto, I am continullay amazed that these were built in mass production. So many items are rather tedious to install and align. The secret might be in the sequencing and sub-assembly steps, none of which I am following!
Ocham's Razor suggests that the simplest solution to a problem is probably the correct one. I was muttering that over and over while attempting to start the new engine. It would flutter but not catch. Should not be the carbs! Should not be the ignition, should not be the crank/piston head assembly, etc, etc - all to complicated, must be something simple.... What would be a simple explanation - nope, plenty of gas in the tank - battery secure with good ground and +12v power delivery.
When I took a peak at the rear exhaust pipe to see if there was any clue in the deposits, it jumped out at me: Duh!!!! The end of the pipe was still swaddled in a plastic bag and a layer of duct tape - put there by the media blaster last May!!! Pulled that off and the sweet thing fired up immediatly.
Here is the last major item I had to buy - the forward exhaust section. The exhaust sounds awesome - better than I remember the 1750 sounding. The pipes are all the same save this front section, which needed to be proper for the shorter 1600 head hight. I stayed with the stainless Stebro product to keep it the same, against my displeasure of the $$$. A bit more than two years ago. I must say they do a good job jigging these up, although even those 1 or 2 degrees of error lead to a lot of %$$###!!!! Stainless of those gauges does NOT bend.
Here is a view of the clutch and master brake linkages under the car. I just love the way the mechanicals stand out against the white paint. Now if only it would stay so clean and bright.
Here is a view down into the transmission shift tower. The shift lever mounts on the rod extending upward. The center "button" is pushed down by the linkage in the shift lever to allow reverse to be selected. The short rod and nut at 4 o'clock keep the arm from comming back (into reverse) unless the button (connected to the little rod protruding out at 3 o-clock) is depressed so as to clear the lock.
One thing I tried this installation is to leave this shift gimbal mechanism out of the tower, and install it after the tranny is in the car. Made getting the engine/tranny a bit easier when dropping it in. That rod sticking up would otherwise drag in the bodywork.
Battery Tray
The last major chassis work was to replace the battery tray. The bottom of the tray was heavily corroded. Probably a combination of rust and battery acid. It was spot-weleded into place, so the wleds were removed with a cutter. That was done last spring when the engine bay was prepped for media blasting.
The bottom of the new pan had to be flattened out a bit. The side shield was mig welded on - couldn't get my wimpy spot welder to bite into the stainless. Holes were marked and drilled to attach to fender and support, to allow it to be plug-welded into place.
I painted the assembly to match the engine bay. The matching upper battery hold down frame was bought also, and it will be secured with two standard threaded rods. The tray holds the original battery rubber tray perfectly! I am planning on using an Odyssey Drycell Battery (it has a red top...)
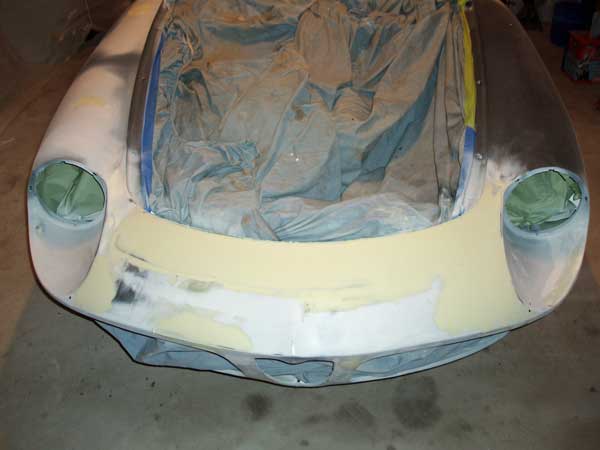
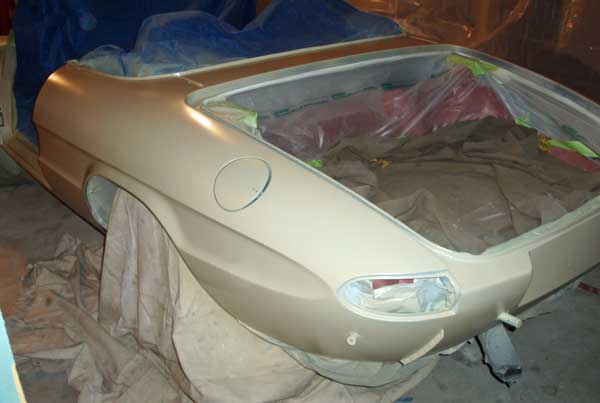
Body in finish primer
09/10/09 22:58 Filed in: Duetto | Restoration
As with the doors, blocking the epoxy primer on the car reveled numerous flaws - nicks, dings, etc. These were all addressed with skim filler. All the lead-filled joints from the factory needed attention, along with the significant work necessary on the weld areas of the nose.
Over the past few days I have been able to get three good coats of primer-surfacer on the body proper. Here is the result. I have already noticed several more small flaws which jumped out after the primer was on. These surfaces still need to be block sanded 220, then wet 400. Within a week or two, I hope to have it in the paint shop to be completed.
More work on the nose
Quite a bit of masking!
There is an engine under there!
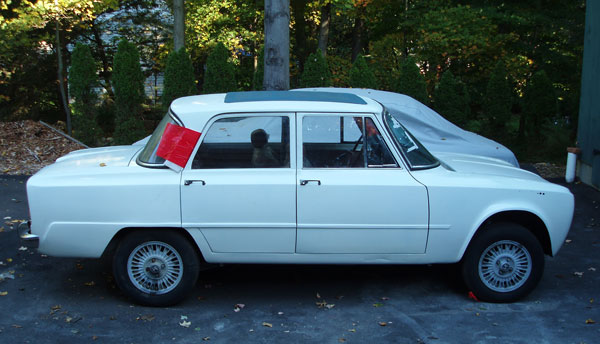
A White Giulia Super
06/10/09 22:16 Filed in: Super
Well, much to the chagrin ( surprise, befuttlement, shock ) of Kathy, I have aquired another "project" for the future. The object of this desire is a 1973 Giulia Super, which I bought on eBay from Atlanta, GA. The car is basically a "Failed Restoration", which was taken back by the eBay seller after 12 years! Much is here, with a few items missing.
Neat things: Recovered seats; a fold-back roof, new paint; no signs of serious shunts ( a bit of a whack on the deft front was roughly but satisfactorily repaired); bumper intact and may actually be usable without re chrome...; rear fenders are flared for hosting larger tires; suspension looks solid; jack points and rockers look fairly solid and original; full instrument cluster provided separately (dash has incorrect gauges installed); lots of the required chrome pieces (no grill); main door gaskets included and likely usable.
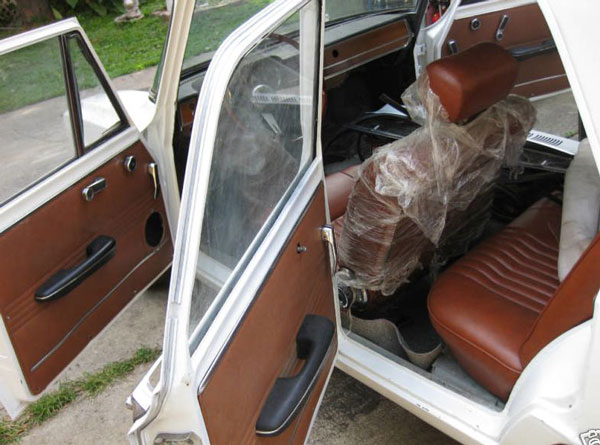
Challenges: No engine/tranny (but driveshafts and trans mounts are there); wiring in a basket (and may not be correct bundle); paint was done at various times, so not a high-quality match - and was repainted in popular white, vs the original dark blue; the floor pans have been repaired fairly well (front patched, rear with a set taken from another super?); looks to be bondo on the forward rocker/wheel well area; no heater or lower control/gauges panel
I am currently weighing my options. I am not in the position to do the kind of restoration I am doing on the Duetto presently, but the car is certainly deserving of resurrection. Perhaps I will just get it together and run it a bit.
Neat things: Recovered seats; a fold-back roof, new paint; no signs of serious shunts ( a bit of a whack on the deft front was roughly but satisfactorily repaired); bumper intact and may actually be usable without re chrome...; rear fenders are flared for hosting larger tires; suspension looks solid; jack points and rockers look fairly solid and original; full instrument cluster provided separately (dash has incorrect gauges installed); lots of the required chrome pieces (no grill); main door gaskets included and likely usable.
Challenges: No engine/tranny (but driveshafts and trans mounts are there); wiring in a basket (and may not be correct bundle); paint was done at various times, so not a high-quality match - and was repainted in popular white, vs the original dark blue; the floor pans have been repaired fairly well (front patched, rear with a set taken from another super?); looks to be bondo on the forward rocker/wheel well area; no heater or lower control/gauges panel
I am currently weighing my options. I am not in the position to do the kind of restoration I am doing on the Duetto presently, but the car is certainly deserving of resurrection. Perhaps I will just get it together and run it a bit.
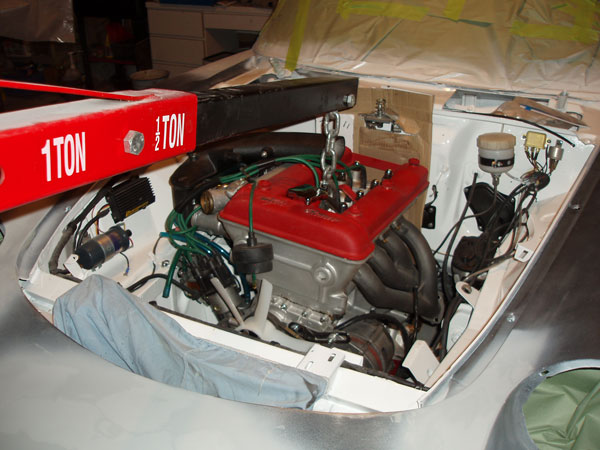
Engine Back in the Duetto
06/10/09 09:39 Filed in: Restoration | Duetto
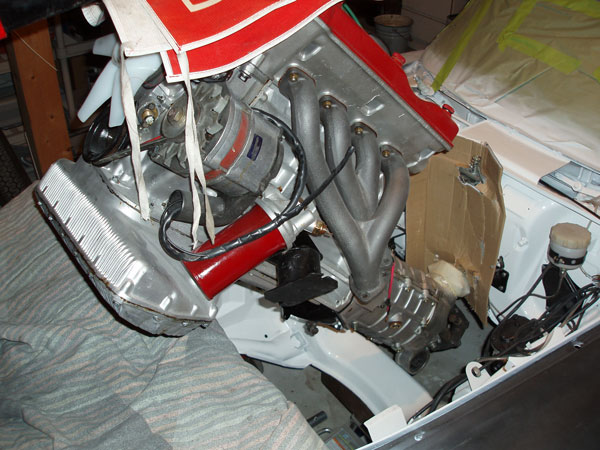
The Duetto has a 1600cc TwinCam again! Last night Kathy and I dropped the rebuilt engine back into the repainted engine bay (See AlfaBB thread on the repaint ).
Others have discussed the best way to drop these back in, my thanks to those pointers. By using the 2nd set of head bolts to mount a spare lifter brace, it allows the engine to hang almost vertically. That allows everything to stuff back into the bay without too much interference. My engine lift needs to pass under the wheel hubs, so I jacked on the cross brace and removed the wheels.
As required, the steering cross-chassis rod was dropped. A cardboard sheet was placed against the firewall to protect it (and the valve cover) from scraping. I should have left the hood latch assembly off, and re-installed after.
Most importantly, I enlisted Kathy to assist. She has great eyes for spotting approaching interference! Boy, that whole thing is tight. Makes one wonder how it was done in mass production!
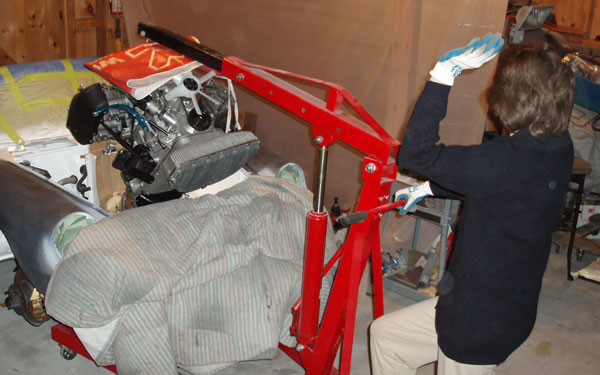
I left the shifter gimbal mechanism out of the transmission to allow a bit more clearance. A jack was needed under the transmission to level thing out as the drop progressed.
The Duetto was originaly built with a similar 1600cc engine, but the first owner replaced it with a newer one years ago. While I am not a big sticlker for originality, this piece seems appropriate.
Others have discussed the best way to drop these back in, my thanks to those pointers. By using the 2nd set of head bolts to mount a spare lifter brace, it allows the engine to hang almost vertically. That allows everything to stuff back into the bay without too much interference. My engine lift needs to pass under the wheel hubs, so I jacked on the cross brace and removed the wheels.
As required, the steering cross-chassis rod was dropped. A cardboard sheet was placed against the firewall to protect it (and the valve cover) from scraping. I should have left the hood latch assembly off, and re-installed after.
Most importantly, I enlisted Kathy to assist. She has great eyes for spotting approaching interference! Boy, that whole thing is tight. Makes one wonder how it was done in mass production!
I left the shifter gimbal mechanism out of the transmission to allow a bit more clearance. A jack was needed under the transmission to level thing out as the drop progressed.
The Duetto was originaly built with a similar 1600cc engine, but the first owner replaced it with a newer one years ago. While I am not a big sticlker for originality, this piece seems appropriate.