
Duetto
Caffeine & Carburetors gathering Sep 18
18/09/11 10:16
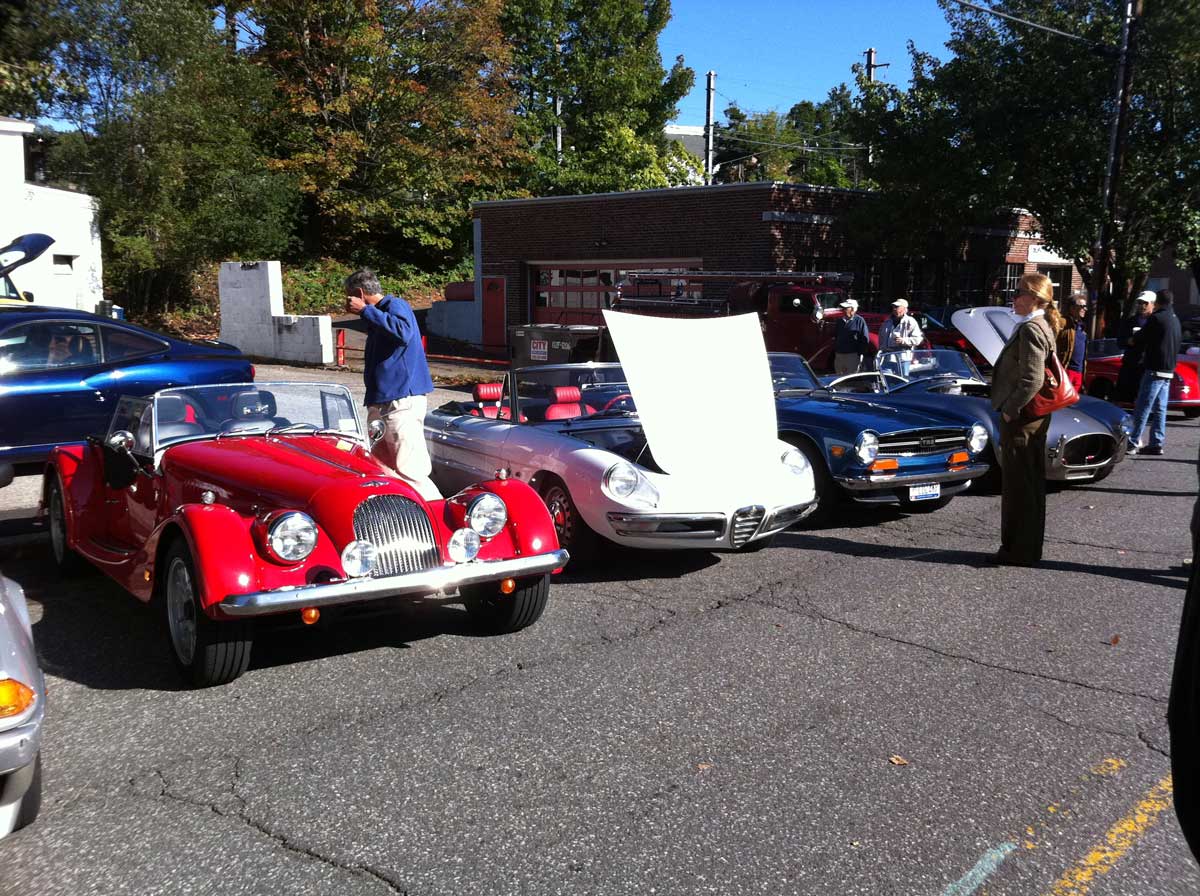
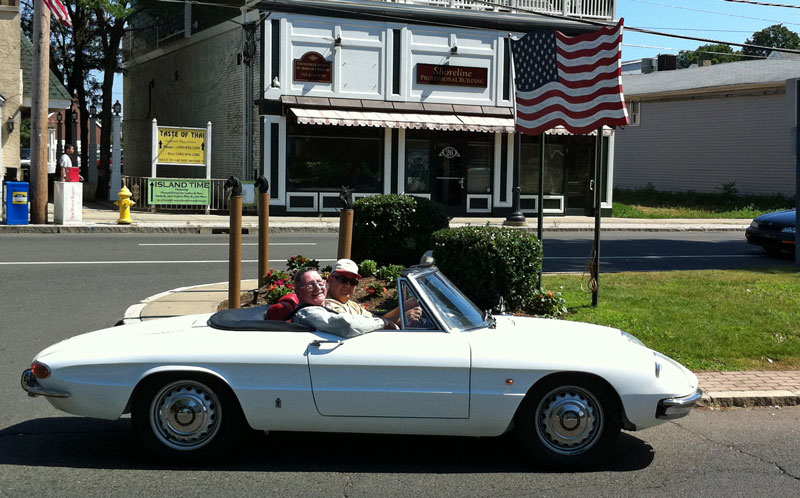
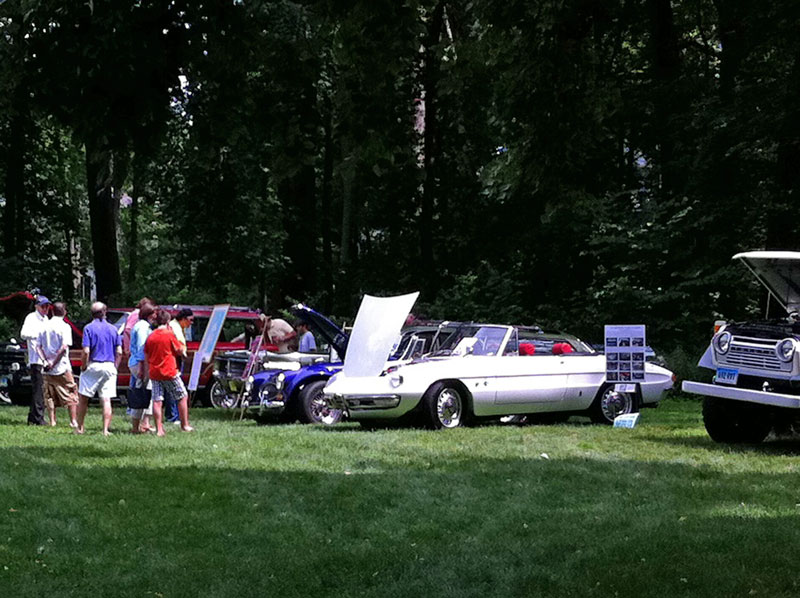
Caffeine & Carburetors’ gathering of automotive enthusiasts had another run on Sept 18th. I took the Duetto up to New Canaan to show her off. I snagged a nice spot on the street, and found myself between a red car and a blue car. Great American statement! It was a truly spectacular morning - a bit nippy, but the sun and sky and cars warmed everyone. Afterward, I picked up Kathy and we ventured over to Westport for a look-see at the Fairfield County Concourse.
Domenico Spadaro Memorial Drive
13/08/11 22:32
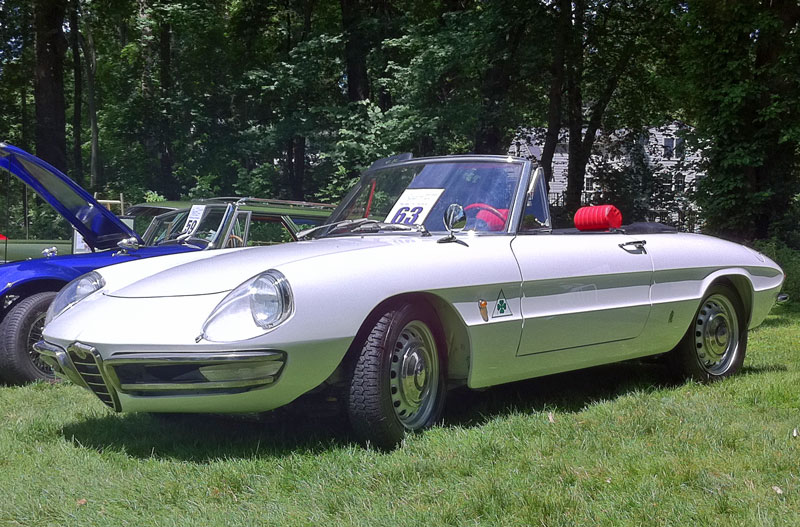
Today, Kathy and I attended the Domenico Spadaro Memorial Drive. This was the 2nd annual edition, and we had a great time. remembering Domenico Spadaro and enjoying a scenic drive in our white Duetto. Our kind hosts for the day were Mike and Meg Bruno.
All net proceeds will be donated to Memorial Sloan Kettering Cancer Center.
More photos on line at Mobile Me

Pano of the field
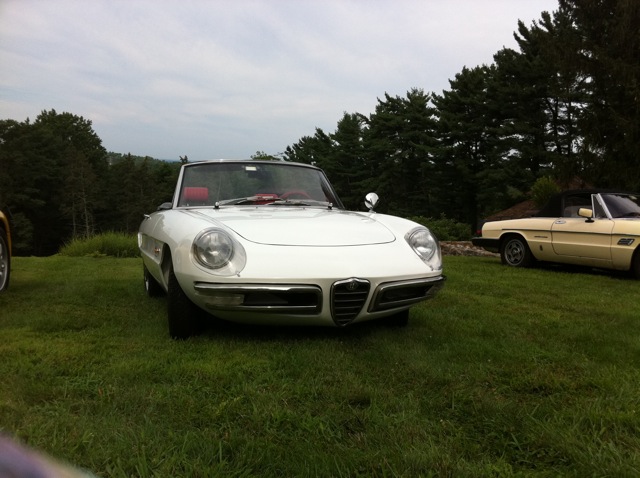
Our Duetto
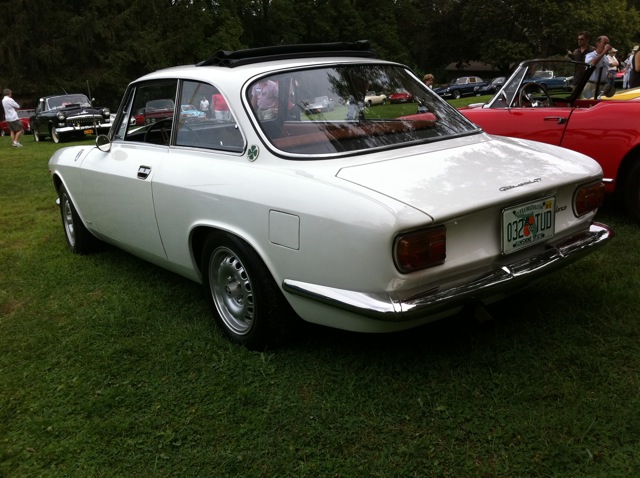
1965 Giulia Sprint GT
All net proceeds will be donated to Memorial Sloan Kettering Cancer Center.
More photos on line at Mobile Me
Pano of the field
Our Duetto
1965 Giulia Sprint GT
Robert Knowles has assembled a video of the event. Our Duetto can be seen cruising across the lawn about 2/3 through the film, just after the announcements.
Scuderia Ficara..(c) knowles media 2011 from Knowles Video, Robert Knowles on Vimeo.
Quiet Down!
17/07/11 20:18
The Duetto has a new center muffler. The Stebro sports exhaust was a bit too rockhaus for our tastes. I purchased a Bosal center unit and put it on.
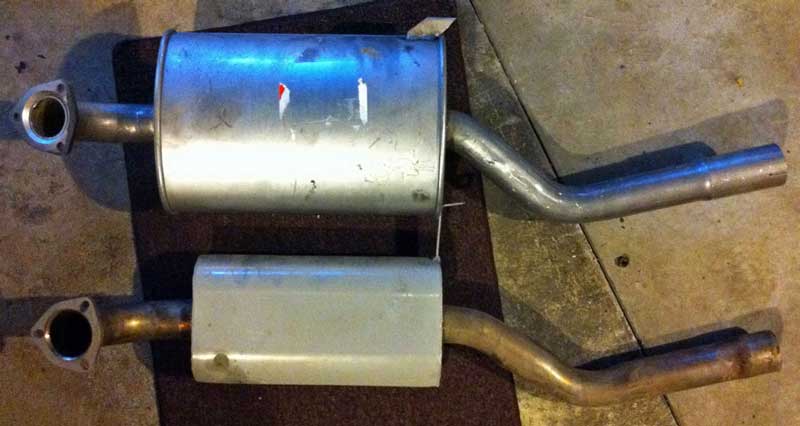
We took her out for a ride today and she now sounds great. A bit of growl, but no ear plugs needed.
Our destination was Milford, CT, where I took friend Ernst out for a ride around town.
We took her out for a ride today and she now sounds great. A bit of growl, but no ear plugs needed.
Our destination was Milford, CT, where I took friend Ernst out for a ride around town.
Duetto's First Outing
19/06/11 15:10
Greetings:
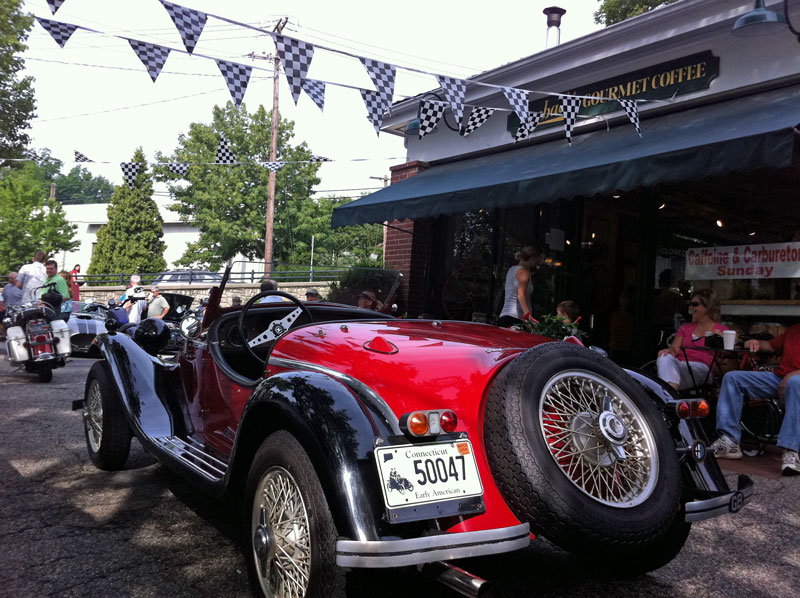
Big day for the White Alfa Duetto! We motored first up north a few miles to the Caffeine & Carbs street meet in downtown New Canaan. Nice collection of cars. What took my breath away was a car that commanded the #1 primo spot in front of the coffee shop: a red Alfa Romeo Gran Sport Quattroruote. I did not locate the owner. We then drove down to Darien for their annual Father's day car show, where the Duetto had its first "formal" showing. No awards, but lots of nice compliments.
Big day for the White Alfa Duetto! We motored first up north a few miles to the Caffeine & Carbs street meet in downtown New Canaan. Nice collection of cars. What took my breath away was a car that commanded the #1 primo spot in front of the coffee shop: a red Alfa Romeo Gran Sport Quattroruote. I did not locate the owner. We then drove down to Darien for their annual Father's day car show, where the Duetto had its first "formal" showing. No awards, but lots of nice compliments.
Alignement
07/06/11 19:57
Greetings:
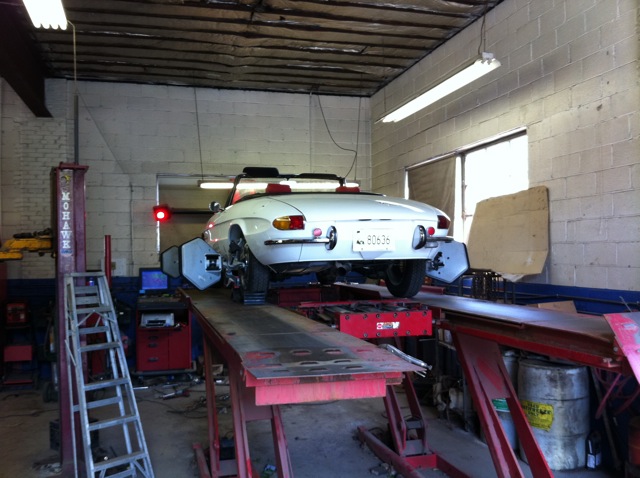
Early this morning I motored over to Port Chester’s Wheel Alignment Plus to get the chassis sorted out. Jim has done all my alignments for 15 years, and is a true artist.
I used grade roads across Stamford and Greenwich so as not to stress the tires with poorly aligned initial setup. Jim said she was quite off, too much toe-in, positive camber and caster out a few degrees. He like the adjustable upper arm, allowing for camber correction. Actually, it was needed to use the hub uprights from the ’72.
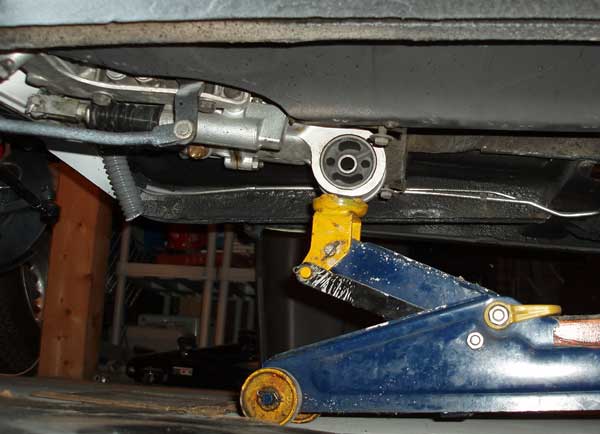
The lift offered an opportunity to snap some photos from below.
Took the Parkway home and took her up to 70 MPH and finally got into 5th gear - nice to know the tranny was reassembled correctly!
Early this morning I motored over to Port Chester’s Wheel Alignment Plus to get the chassis sorted out. Jim has done all my alignments for 15 years, and is a true artist.
I used grade roads across Stamford and Greenwich so as not to stress the tires with poorly aligned initial setup. Jim said she was quite off, too much toe-in, positive camber and caster out a few degrees. He like the adjustable upper arm, allowing for camber correction. Actually, it was needed to use the hub uprights from the ’72.
The lift offered an opportunity to snap some photos from below.
Took the Parkway home and took her up to 70 MPH and finally got into 5th gear - nice to know the tranny was reassembled correctly!
First Light
06/06/11 17:13
Greetings:
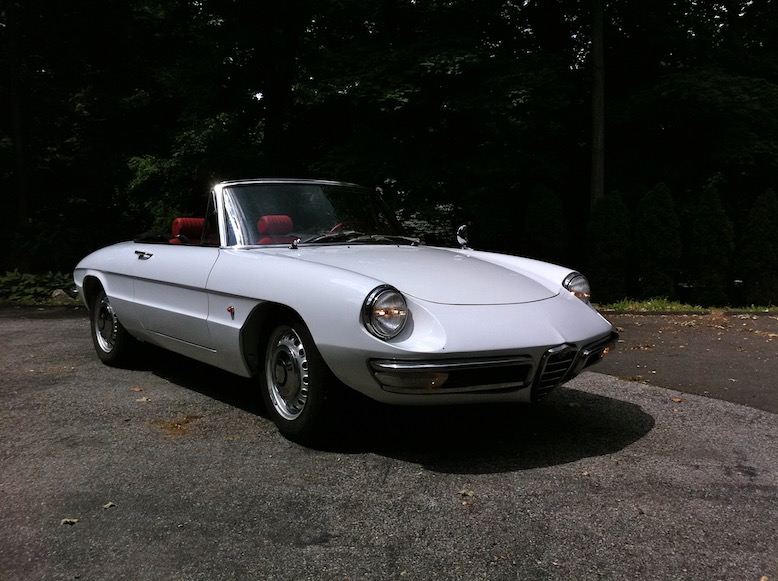
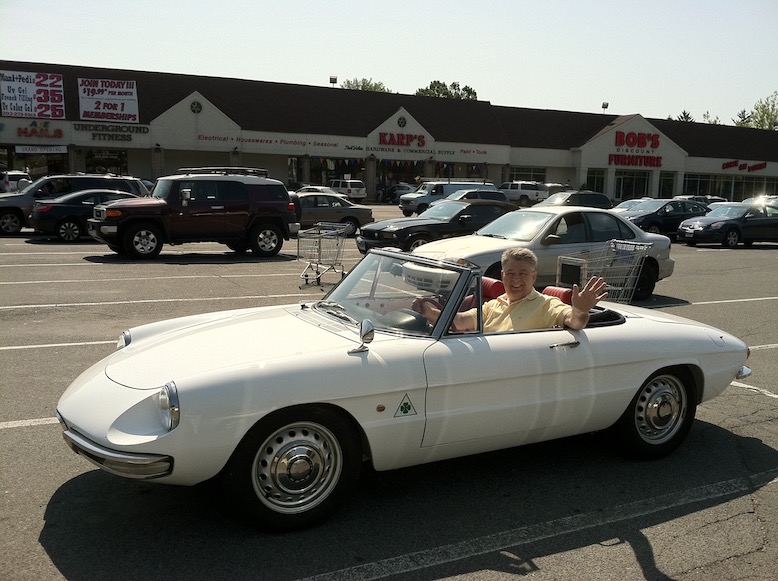
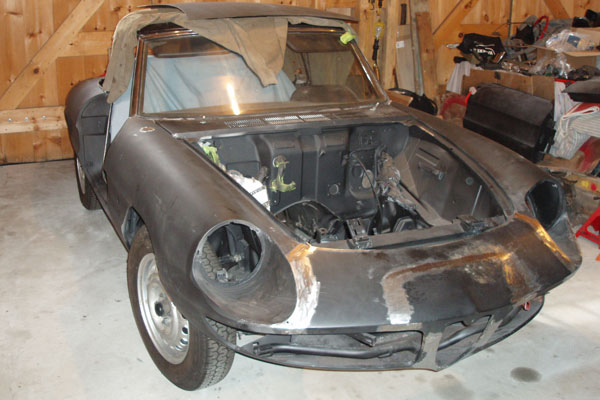
After a 2 years + of power train rebuilding, bodywork, painting and foot dragging, the Duetto is once again road worthy.
Kathy and I took a short jaunt down to the local strip mall to get some groceries and visit the local hardware store, where many of the metric hardware items I needed were obtained. Engine starts, gears shift, brakes stop, and carbs burble.
Yet to do: aim the headlights and install the covers, install the top and the door panels, install the Pinnafarina badges. A trip to Wheel Alignments Plus will be taken tomorrow to get the front-end set up.
Hope to attend a Concorso Ferrari & Friends event and the 4th annual CT AROC luncheon over the coming weeks.
Back from the Paint Shop
18/05/10 10:02
Greetings:
Our duetto is back home safe from the paint shop. I am thrilled with the quality of the work! I had brought the doors and lids back to them a few weeks ago for mounting, alignment and final sanding and polish as a unit. I now need to dig in and get her reassembled in time for the convention.... Dang, I feel like I'm in one of those reality TV shows where the pressure is on to get the car ready for Pebble Beach! Our black S4 is waiting in the wings if I don't have time to finish and put a few hundred miles on before the pre-tour.
The only scary things lurking is getting the door windows back in, with all those pulleys and wire, and then the top: I am still hoping to find someone local who has actually done a duetto top, as it is different than all the latter spiders.
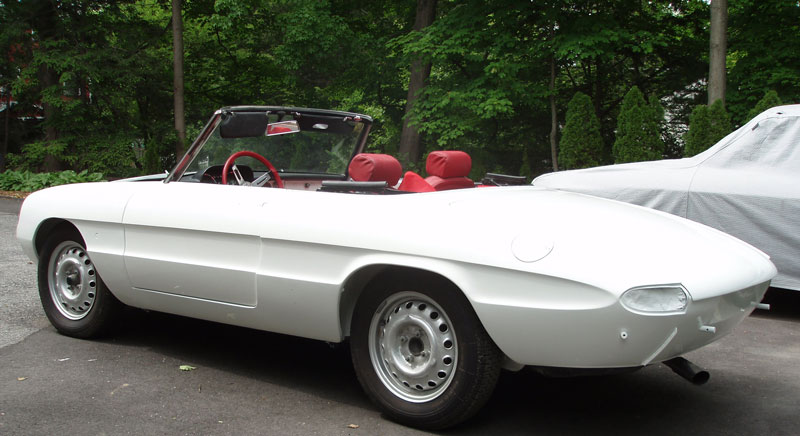
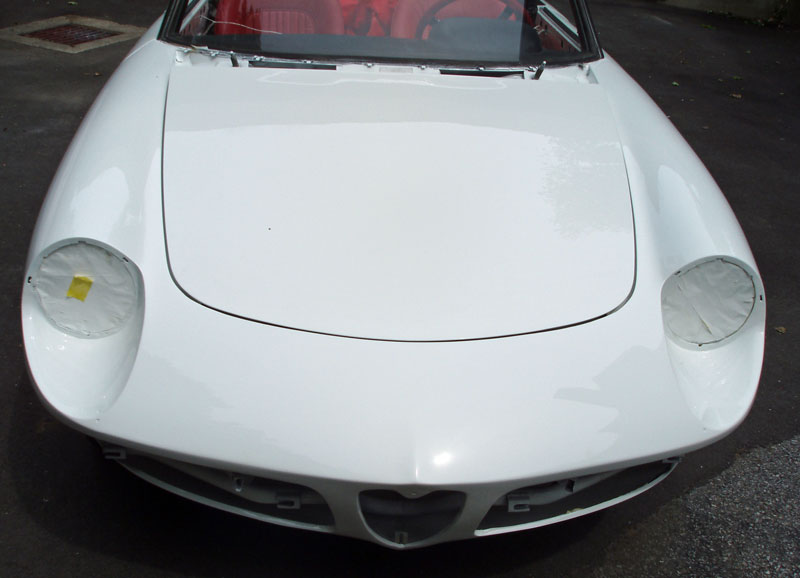
Shinny White Paint!
13/02/10 23:03
Hallelujah! The paint shop has shot the Duetto, and it is a beautiful thing. The paint is now resting. Over the next few weeks, I will get the doors and lids hung back on, then they will polish it out as a set to get it up to a brilliant finish. Looking at these photos, she looks brilliant already.
Duetto in Paint Shop
04/01/10 19:37
Our Duetto is finally in the body shop for its final paint coats. The arrival was delayed while the shop was otherwise engaged making our Audi Avant whole again.
Not quite a fair exchange, but the Audi is a bit more pratical during the winter :)
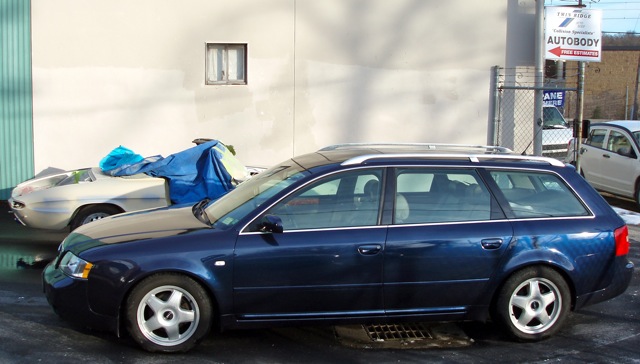
Both doors on this side of the Audi were replaced, and this side was nicely repainted for a great match. The damage was wrought by a Jeep SUV whose driver felt invincible on Interstate 84 during an ice storm. She was passing me in great hast when she slid into the median gardrail and bounced off directly into the Audi's center pillar. Ouch! Luckily we maintained control and no further damage was generated. Hats off to the driver, as she admittd fault and her company picked up the repairs.
Not quite a fair exchange, but the Audi is a bit more pratical during the winter :)
Both doors on this side of the Audi were replaced, and this side was nicely repainted for a great match. The damage was wrought by a Jeep SUV whose driver felt invincible on Interstate 84 during an ice storm. She was passing me in great hast when she slid into the median gardrail and bounced off directly into the Audi's center pillar. Ouch! Luckily we maintained control and no further damage was generated. Hats off to the driver, as she admittd fault and her company picked up the repairs.
White Paint!
28/12/09 18:34
The Duetto's two doors, the hood and the trunk (boot) lid have been finished by the body shop. They are now resting in the barn, awaiting their re-attachment to the car. That will not happen untill the car itself is painted. Hopefully she will be moved over the Twin Ridge just after New Years. It should be in there now, but its place was taken taken by our Blue Audi Avant, which was involved in a mishap.
"Its a car again!
26/10/09 08:31
The rebuilt 1600cc engine is running in the Duetto! Kathy watched as I started it up and declared "Its a car again!" Well, the paint needs to go on, along with all the trim, but one could certainly drive it down to the grocery store in a pinch 
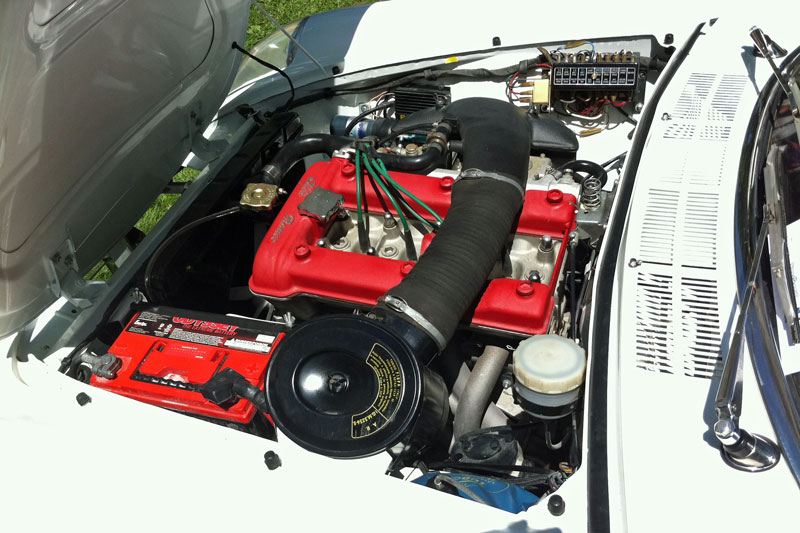
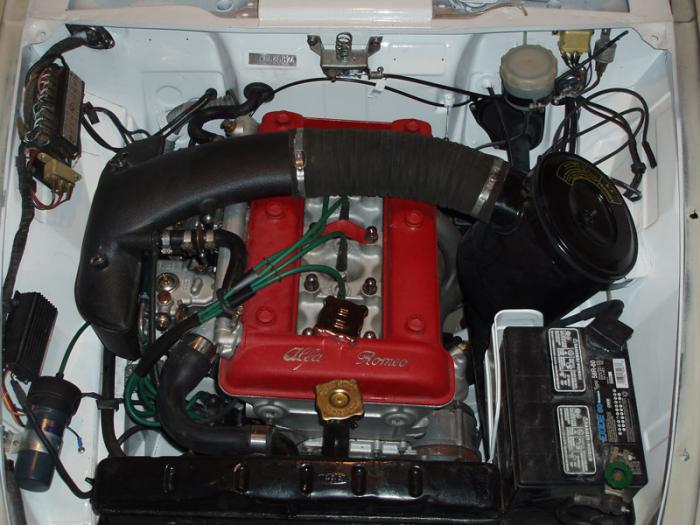
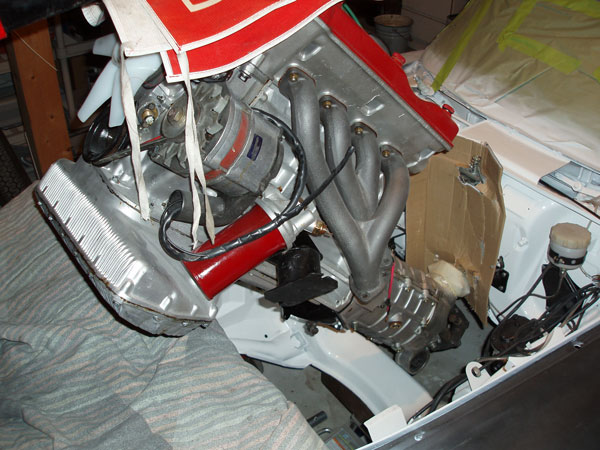
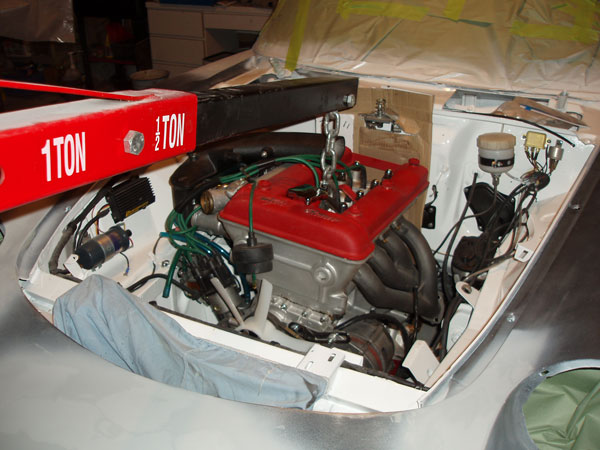
Here is the final product - red powder coated valve cover and black powder coated carb pennum.
Assembling the Duetto, I am continullay amazed that these were built in mass production. So many items are rather tedious to install and align. The secret might be in the sequencing and sub-assembly steps, none of which I am following!
Ocham's Razor suggests that the simplest solution to a problem is probably the correct one. I was muttering that over and over while attempting to start the new engine. It would flutter but not catch. Should not be the carbs! Should not be the ignition, should not be the crank/piston head assembly, etc, etc - all to complicated, must be something simple.... What would be a simple explanation - nope, plenty of gas in the tank - battery secure with good ground and +12v power delivery.
When I took a peak at the rear exhaust pipe to see if there was any clue in the deposits, it jumped out at me: Duh!!!! The end of the pipe was still swaddled in a plastic bag and a layer of duct tape - put there by the media blaster last May!!! Pulled that off and the sweet thing fired up immediatly.
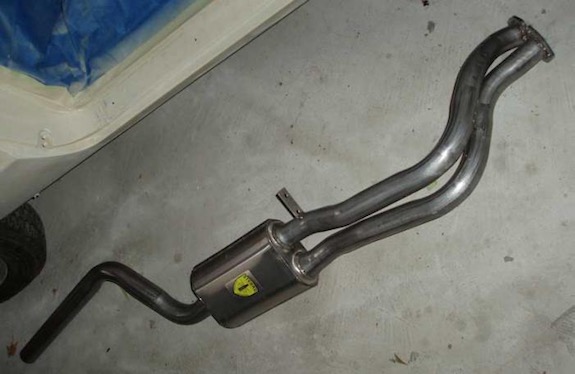
Here is the last major item I had to buy - the forward exhaust section. The exhaust sounds awesome - better than I remember the 1750 sounding. The pipes are all the same save this front section, which needed to be proper for the shorter 1600 head hight. I stayed with the stainless Stebro product to keep it the same, against my displeasure of the $$$. A bit more than two years ago. I must say they do a good job jigging these up, although even those 1 or 2 degrees of error lead to a lot of %$$###!!!! Stainless of those gauges does NOT bend.
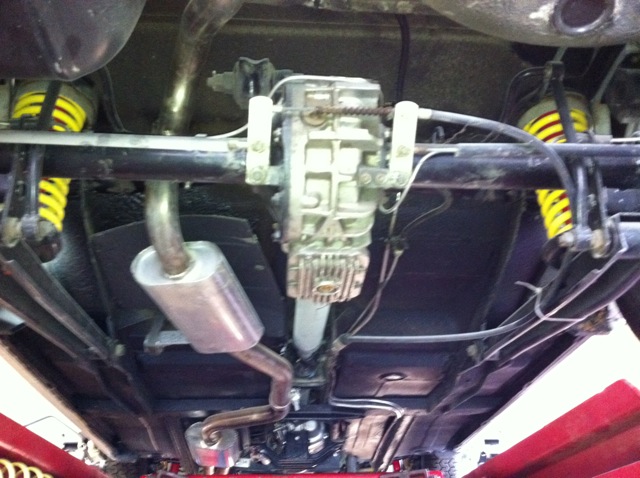
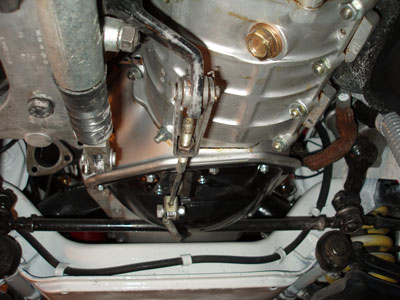
Here is a view of the clutch and master brake linkages under the car. I just love the way the mechanicals stand out against the white paint. Now if only it would stay so clean and bright.
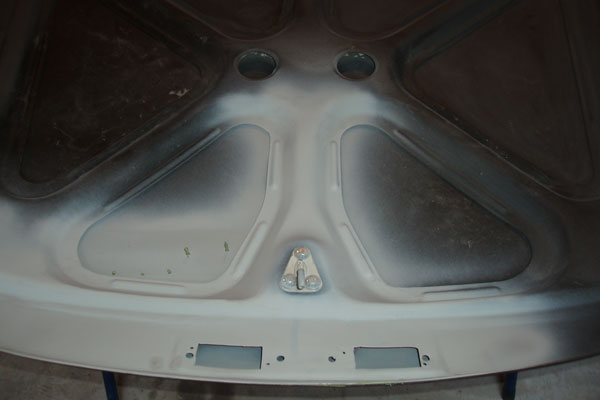
Here is a view down into the transmission shift tower. The shift lever mounts on the rod extending upward. The center "button" is pushed down by the linkage in the shift lever to allow reverse to be selected. The short rod and nut at 4 o'clock keep the arm from comming back (into reverse) unless the button (connected to the little rod protruding out at 3 o-clock) is depressed so as to clear the lock.
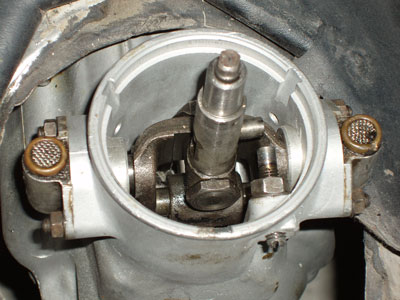
One thing I tried this installation is to leave this shift gimbal mechanism out of the tower, and install it after the tranny is in the car. Made getting the engine/tranny a bit easier when dropping it in. That rod sticking up would otherwise drag in the bodywork.
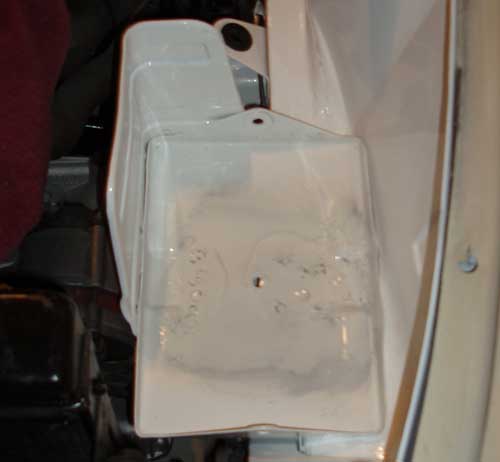
The last major chassis work was to replace the battery tray. The bottom of the tray was heavily corroded. Probably a combination of rust and battery acid. It was spot-weleded into place, so the wleds were removed with a cutter. That was done last spring when the engine bay was prepped for media blasting.
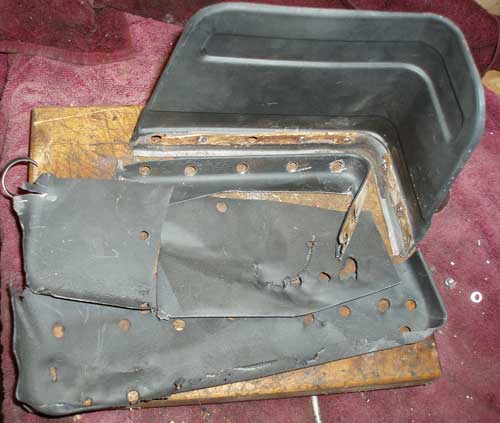
The side shield was still in fine condition, so I thought I would just procure a bottom tray and re-assemble. Finding a tray proved difficult. (geeze, I had 6 months!) I bought one that was perfect - for my 72 GTV... Those folks in Texas had a nice stainless one - but at a staggery price. For the same numbers in euros, I found a complete unit at a German supplier - even had the support brace. In the end, i bought a generic stainless tray for relative peanuts and went about making it fit.

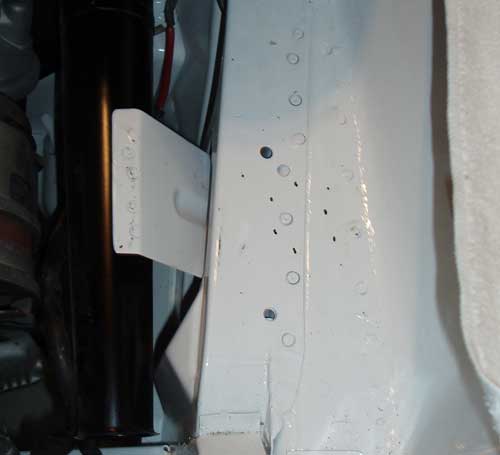
The bottom of the new pan had to be flattened out a bit. The side shield was mig welded on - couldn't get my wimpy spot welder to bite into the stainless. Holes were marked and drilled to attach to fender and support, to allow it to be plug-welded into place.
The mounting area was marked for the weld points, then the paint was ground off and replaced with weld-through primer. Owing to the deep dish of the new tray, the mounting area on the fender will be about 1/3 the number of the original welds, but the result feels really solid. As an upside, there will be less snug-fitting area underneath to collect water and pose a rust issue in the future.
I painted the assembly to match the engine bay. The matching upper battery hold down frame was bought also, and it will be secured with two standard threaded rods. The tray holds the original battery rubber tray perfectly! I am planning on using an Odyssey Drycell Battery (it has a red top...)

Here is the final product - red powder coated valve cover and black powder coated carb pennum.
Assembling the Duetto, I am continullay amazed that these were built in mass production. So many items are rather tedious to install and align. The secret might be in the sequencing and sub-assembly steps, none of which I am following!
Ocham's Razor suggests that the simplest solution to a problem is probably the correct one. I was muttering that over and over while attempting to start the new engine. It would flutter but not catch. Should not be the carbs! Should not be the ignition, should not be the crank/piston head assembly, etc, etc - all to complicated, must be something simple.... What would be a simple explanation - nope, plenty of gas in the tank - battery secure with good ground and +12v power delivery.
When I took a peak at the rear exhaust pipe to see if there was any clue in the deposits, it jumped out at me: Duh!!!! The end of the pipe was still swaddled in a plastic bag and a layer of duct tape - put there by the media blaster last May!!! Pulled that off and the sweet thing fired up immediatly.
Here is the last major item I had to buy - the forward exhaust section. The exhaust sounds awesome - better than I remember the 1750 sounding. The pipes are all the same save this front section, which needed to be proper for the shorter 1600 head hight. I stayed with the stainless Stebro product to keep it the same, against my displeasure of the $$$. A bit more than two years ago. I must say they do a good job jigging these up, although even those 1 or 2 degrees of error lead to a lot of %$$###!!!! Stainless of those gauges does NOT bend.
Here is a view of the clutch and master brake linkages under the car. I just love the way the mechanicals stand out against the white paint. Now if only it would stay so clean and bright.
Here is a view down into the transmission shift tower. The shift lever mounts on the rod extending upward. The center "button" is pushed down by the linkage in the shift lever to allow reverse to be selected. The short rod and nut at 4 o'clock keep the arm from comming back (into reverse) unless the button (connected to the little rod protruding out at 3 o-clock) is depressed so as to clear the lock.
One thing I tried this installation is to leave this shift gimbal mechanism out of the tower, and install it after the tranny is in the car. Made getting the engine/tranny a bit easier when dropping it in. That rod sticking up would otherwise drag in the bodywork.
Battery Tray
The last major chassis work was to replace the battery tray. The bottom of the tray was heavily corroded. Probably a combination of rust and battery acid. It was spot-weleded into place, so the wleds were removed with a cutter. That was done last spring when the engine bay was prepped for media blasting.
The bottom of the new pan had to be flattened out a bit. The side shield was mig welded on - couldn't get my wimpy spot welder to bite into the stainless. Holes were marked and drilled to attach to fender and support, to allow it to be plug-welded into place.
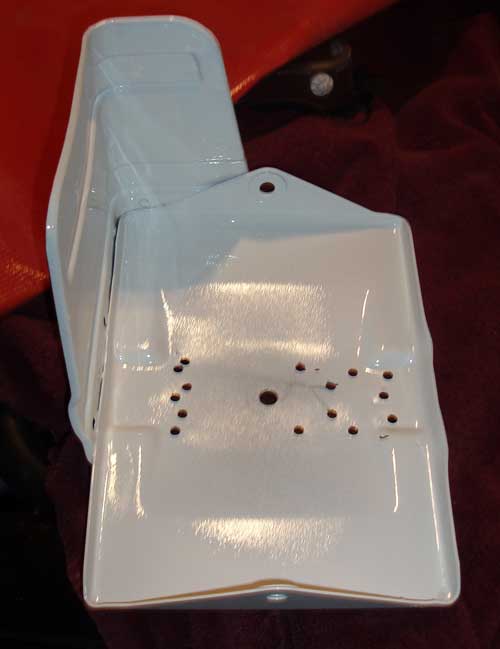
I painted the assembly to match the engine bay. The matching upper battery hold down frame was bought also, and it will be secured with two standard threaded rods. The tray holds the original battery rubber tray perfectly! I am planning on using an Odyssey Drycell Battery (it has a red top...)
Body in finish primer
09/10/09 22:58
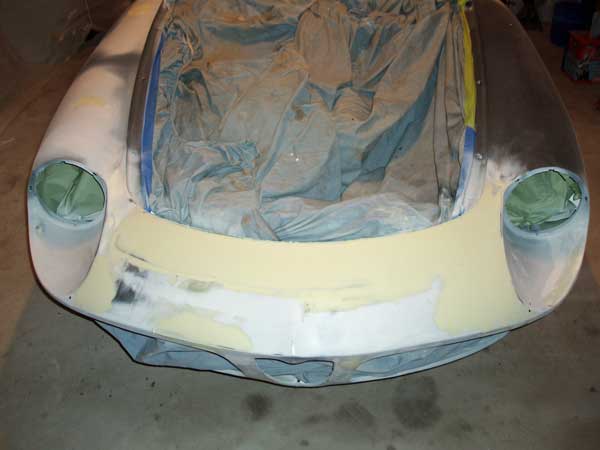
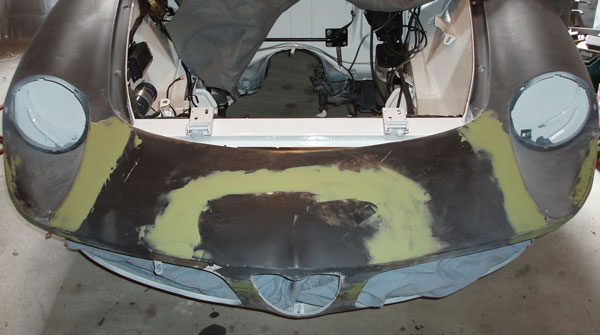
As with the doors, blocking the epoxy primer on the car reveled numerous flaws - nicks, dings, etc. These were all addressed with skim filler. All the lead-filled joints from the factory needed attention, along with the significant work necessary on the weld areas of the nose.
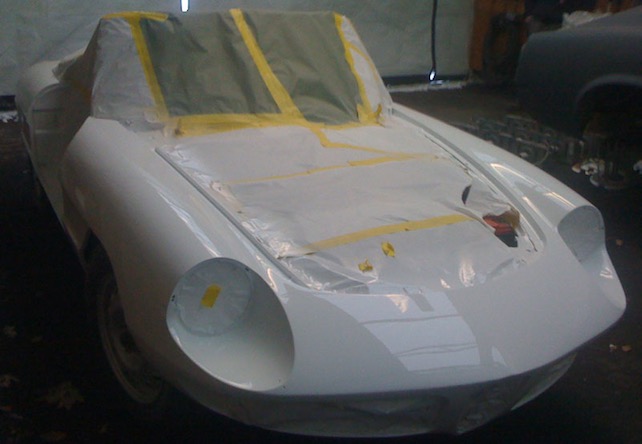
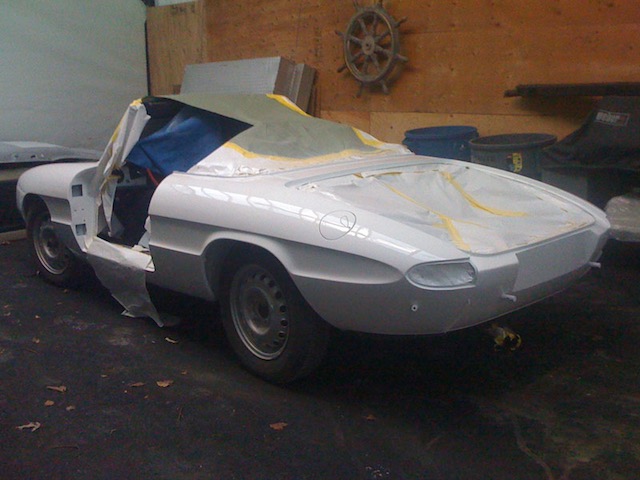
Over the past few days I have been able to get three good coats of primer-surfacer on the body proper. Here is the result. I have already noticed several more small flaws which jumped out after the primer was on. These surfaces still need to be block sanded 220, then wet 400. Within a week or two, I hope to have it in the paint shop to be completed.
More work on the nose
Quite a bit of masking!
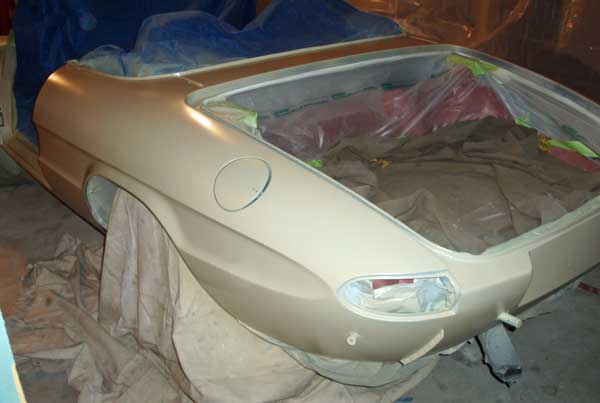
There is an engine under there!

Over the past few days I have been able to get three good coats of primer-surfacer on the body proper. Here is the result. I have already noticed several more small flaws which jumped out after the primer was on. These surfaces still need to be block sanded 220, then wet 400. Within a week or two, I hope to have it in the paint shop to be completed.
More work on the nose
Quite a bit of masking!
There is an engine under there!
Engine Back in the Duetto
06/10/09 09:39
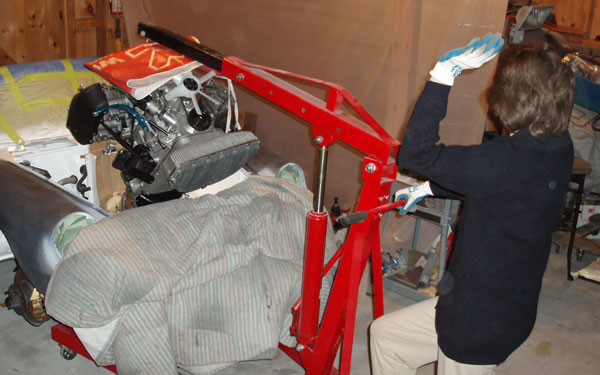
The Duetto has a 1600cc TwinCam again! Last night Kathy and I dropped the rebuilt engine back into the repainted engine bay (See AlfaBB thread on the repaint ).
Others have discussed the best way to drop these back in, my thanks to those pointers. By using the 2nd set of head bolts to mount a spare lifter brace, it allows the engine to hang almost vertically. That allows everything to stuff back into the bay without too much interference. My engine lift needs to pass under the wheel hubs, so I jacked on the cross brace and removed the wheels.
As required, the steering cross-chassis rod was dropped. A cardboard sheet was placed against the firewall to protect it (and the valve cover) from scraping. I should have left the hood latch assembly off, and re-installed after.
Most importantly, I enlisted Kathy to assist. She has great eyes for spotting approaching interference! Boy, that whole thing is tight. Makes one wonder how it was done in mass production!
I left the shifter gimbal mechanism out of the transmission to allow a bit more clearance. A jack was needed under the transmission to level thing out as the drop progressed.
The Duetto was originaly built with a similar 1600cc engine, but the first owner replaced it with a newer one years ago. While I am not a big sticlker for originality, this piece seems appropriate.
Skimming off the top
30/09/09 18:51
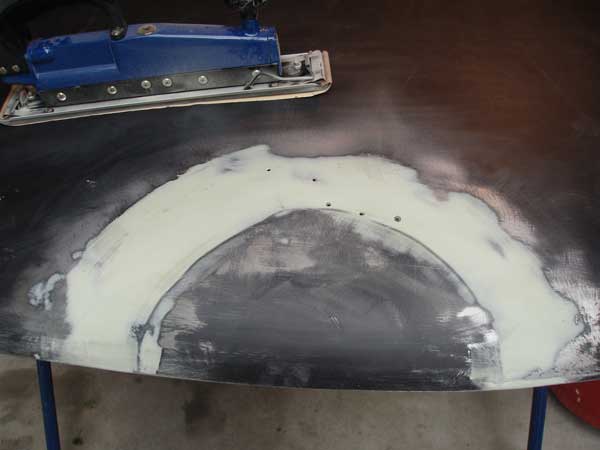
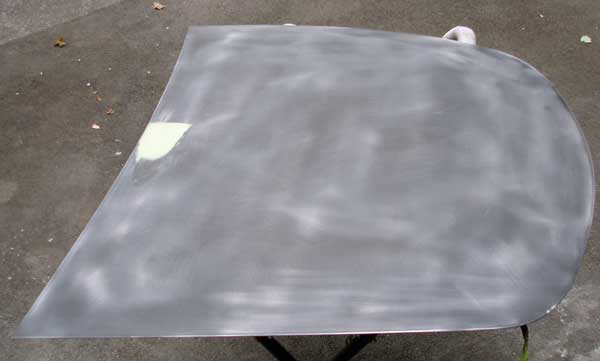
Now that the interior paint is on, time to move to the exterior. Obviously the Duetto does not have a 'Top", but there is a lot of area in the trunk lid and the hood! Taken down to the metal, the body revealed 42 years of door dings and taps. These represent a bit of work to either bump them and/or level them with filler. This work has actually taken a few days, scattered in between the paint work and reassembly work.
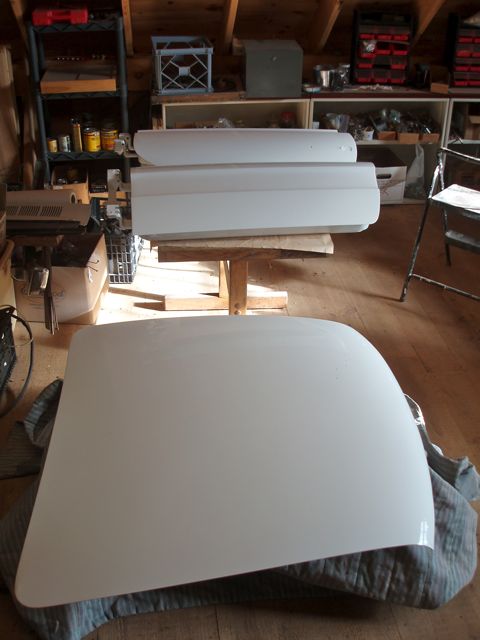
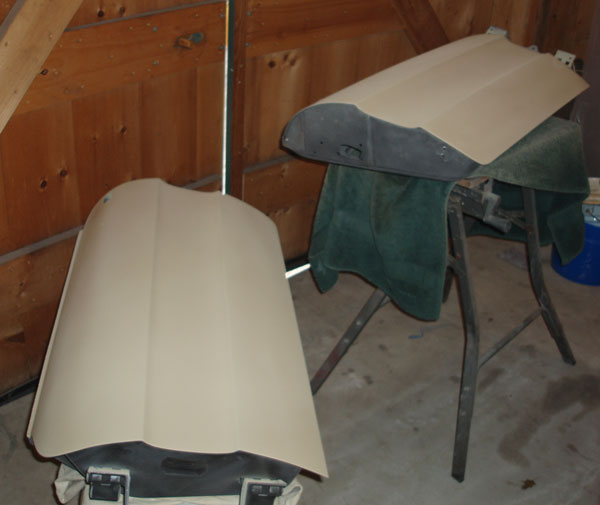
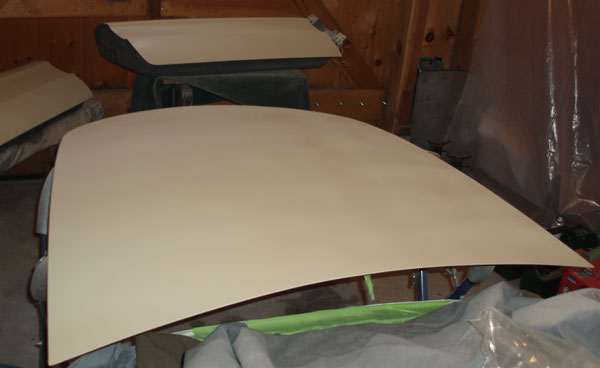
Over the past few days the final touches were made to the "loose" parts - doors, trunk lid and the hood. A few coats of polyester primer/surfacer were applied, and the end result looks promising. I will sand this down a bit and deliver the 4 items to the shop, where they will be finished in a 2-stage process in a proper paint booth.
I dumped a full quart of polysester surfacer on the 4 pannels!
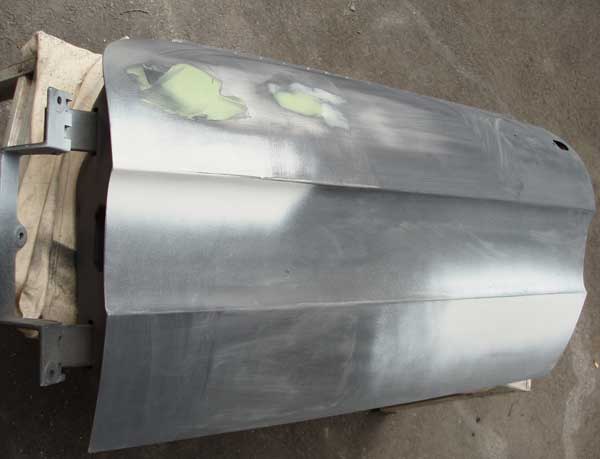
The trunk lid took a majority of my effort over the past few weeks, as it has been challanging to restore the compound curves both inside and outside.
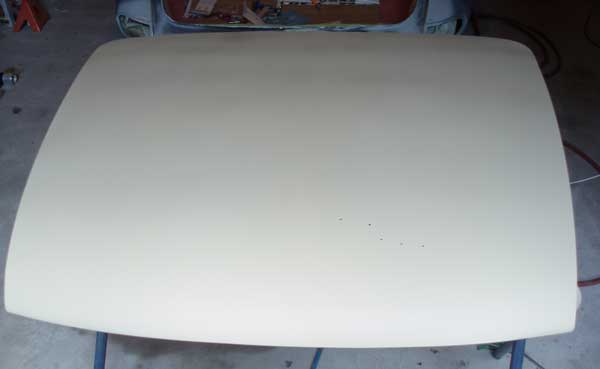
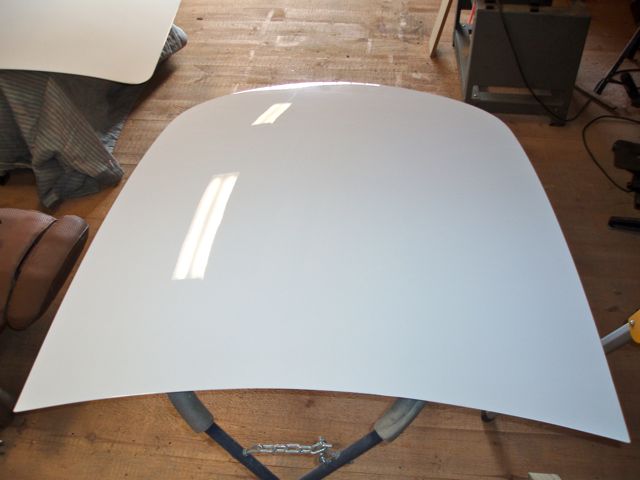
The hood had only one area that needed attention
I also put the first skim coat on the nose bodywork areas.
Over the past few days the final touches were made to the "loose" parts - doors, trunk lid and the hood. A few coats of polyester primer/surfacer were applied, and the end result looks promising. I will sand this down a bit and deliver the 4 items to the shop, where they will be finished in a 2-stage process in a proper paint booth.
I dumped a full quart of polysester surfacer on the 4 pannels!
The trunk lid took a majority of my effort over the past few weeks, as it has been challanging to restore the compound curves both inside and outside.
The hood had only one area that needed attention
I also put the first skim coat on the nose bodywork areas.
Getting the Transmission Together
27/09/09 22:27
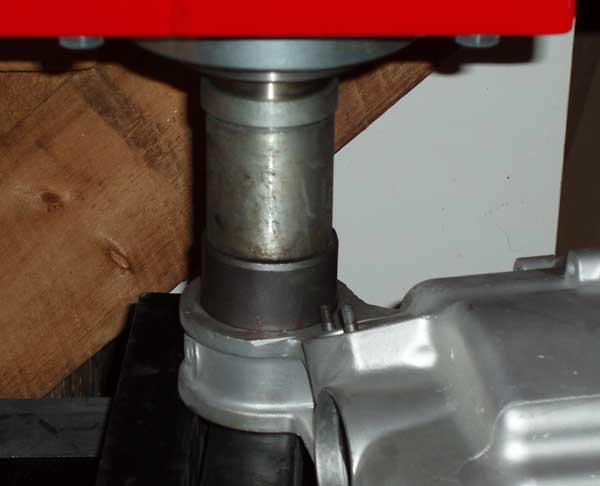
The Duetto will be getting the transmission from the OMG Stepnose. It was degreesed and disassembled. All the hardware was zinc plated, and the casings were media blasted. The main shaft stack was rebuilt by Dominick's, along with the driveshaft center bearing. Frank at Dominic's replaced the 1-2 Synchroring and sleeve, and swapped the 3-4 with the 5th gear synchro. Today I reassembled the gearbox.
The rear mount is replaced with a new bushing; here it is being pressed into the rear tower case.
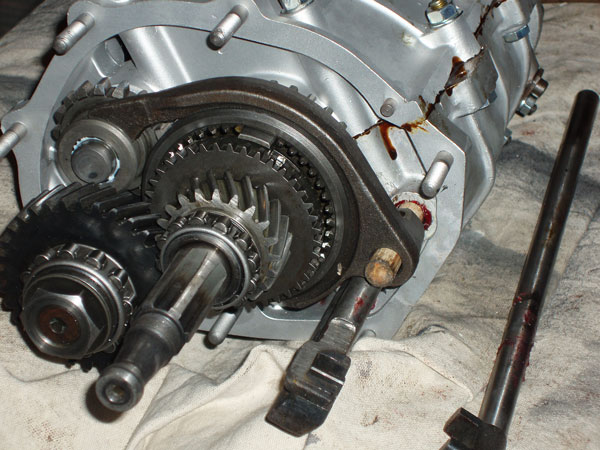
Then the shift rods were insterted, along with their lock-out beans and detent balls. The two shafts were inserted and 1-2 and 3-4 shift forks aligned.

Reverse gear is added and then then the two halves are joined. The 5th-reverse fork gets added at the end, facilitated by a wodden dowel that acts as a dummy in the assembly until this stage.
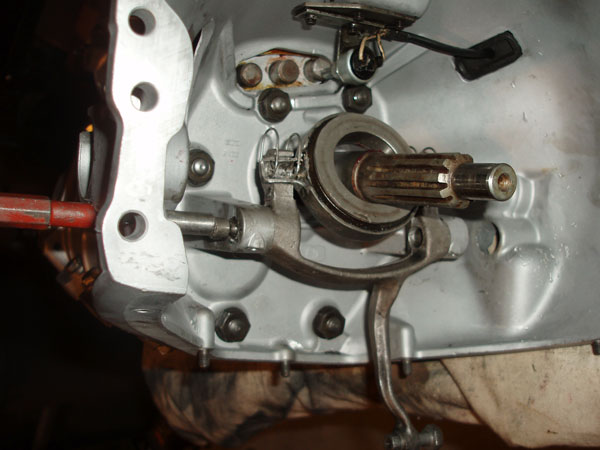
The rear tower is added, along with a new rear seal. Then the belhousing is added, along with another new seal and the cluch fork, throwout bearing, and reverse switch.
Here, she is almost complete. Next will be to add the rear drive yoke. It will be mated to the engine just prior to dropping it in the car, as I don't want to overload the stand untill it is all attached to the engine hoist.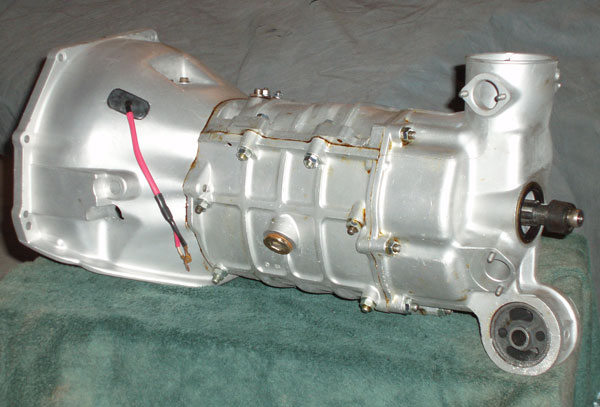
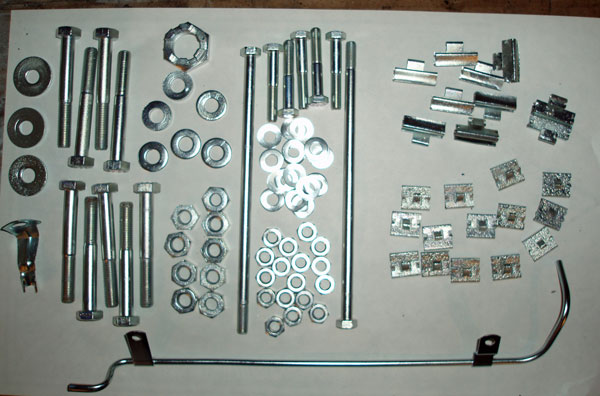
Note that those shiny new nuts, washers and botls are not new. They are the original hardware that was treated to a professional zinc plating. In the same batch, I did the steering mounting hardware, a big batch of door panel mounting clips, and a tube for the Alfetta.
The rear mount is replaced with a new bushing; here it is being pressed into the rear tower case.
Then the shift rods were insterted, along with their lock-out beans and detent balls. The two shafts were inserted and 1-2 and 3-4 shift forks aligned.
Reverse gear is added and then then the two halves are joined. The 5th-reverse fork gets added at the end, facilitated by a wodden dowel that acts as a dummy in the assembly until this stage.
The rear tower is added, along with a new rear seal. Then the belhousing is added, along with another new seal and the cluch fork, throwout bearing, and reverse switch.
Here, she is almost complete. Next will be to add the rear drive yoke. It will be mated to the engine just prior to dropping it in the car, as I don't want to overload the stand untill it is all attached to the engine hoist.
Note that those shiny new nuts, washers and botls are not new. They are the original hardware that was treated to a professional zinc plating. In the same batch, I did the steering mounting hardware, a big batch of door panel mounting clips, and a tube for the Alfetta.
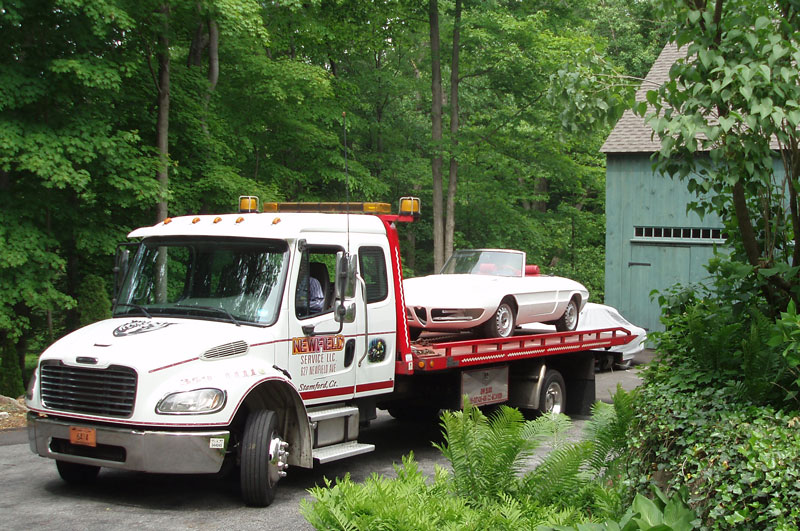
Duetto back home for prep
11/09/09 21:29
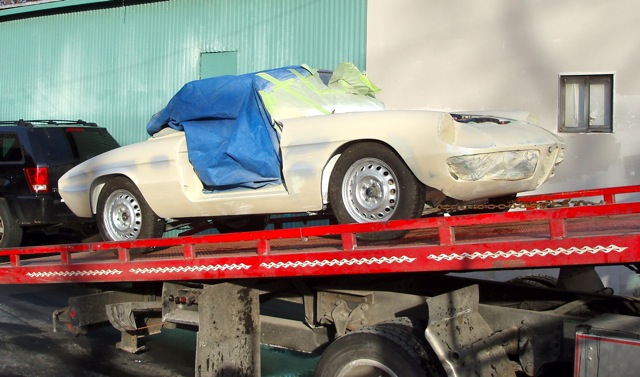
Time to bring the Duetto back home. She was removed from the panel shop on Tuesday and placed back in the barn. After discussions with one additional local body shop, I am close to a decision to do most of the remaining work - filler and sanding, along with the engine bay, thunk interior and fender wells - myself. If all goes well, I will deliver the duetto to a local shop to have the final paint shoot in a proper booth.
It has become apparent that I have no appetite for paying the going rate for filler and surface prep work! The metal work was first rate, and gladly expensed.
On paint: I did locate a Sikkens color formula for Farina Blanco, which is specifically listed in there database as only 1966 and 1967 usage. Interestingly, it shows up under "greys" in their on-line system.
Also under consideration is using a tinted bed liner in the wheel wells. Several brands are available that are clear and will accept urethane tints, so perhaps I can hit them with Farina Blanco also.
Back in barn with all metal work finished
Progress on internal trunk lid filler work.